7 Signs Your Sourdough Starter Is Ready to Bake — And What Happens When It’s Not
This post contains affiliate links. If you purchase through my links I may earn a small commission at no extra cost to you. I only recommend products I actually use and trust.
Want my exact same-day sourdough method I use every morning on our ranch?
👉 Grab the free cheat sheet here:
Knowing if your sourdough starter is ready to bake is the most common question I get…
Knowing if your sourdough starter is ready to bake is crucial for achieving the perfect loaf. The signs that indicate your sourdough starter ready to bake can make all the difference.
Recognizing your sourdough starter ready to bake is essential for any baker. This knowledge enhances your baking experience.
Understanding when your sourdough starter is ready to bake can greatly improve your baking results.
Not how to make a starter. Not how to bake a loaf. It’s this: how do I know when my starter is actually ready?
The timing of when your sourdough starter is ready to bake can be tricky; knowing the signs is key.
And I get it. Because nothing in sourdough is more frustrating than putting in all that work — the mixing, the shaping, the waiting — and pulling a flat, sad loaf out of the oven. I’ve been there. Twice, actually, in very different directions.
These indicators show that your sourdough starter is ready to bake and will yield the best results.
I once baked too early. The loaf barely rose but was still edible — which is honestly the most depressing outcome in baking. Not a disaster, just disappointing. Like making plans and having them turn out fine but not great.
Recognizing the indicators of a sourdough starter ready to bake will help you succeed in your baking endeavors.
Make sure you follow these tips to confirm your sourdough starter ready to bake is in its prime.
When you bake, you want to make sure your sourdough starter ready to bake has been properly fed and maintained.
It’s important to ensure that your sourdough starter ready to bake has reached its peak before you proceed with baking.
So, let’s explore the 7 signs that indicate your sourdough starter is ready to bake.
When you recognize these signs, you’ll know your sourdough starter ready to bake.
I once waited too long. The dough collapsed in the oven like it had given up entirely. It had. The starter was past its peak and there was nothing left in it.
Both of those mistakes taught me something: timing matters, and your starter will tell you when it’s ready if you know what to look for.
Here are the 7 signs I check every single time.
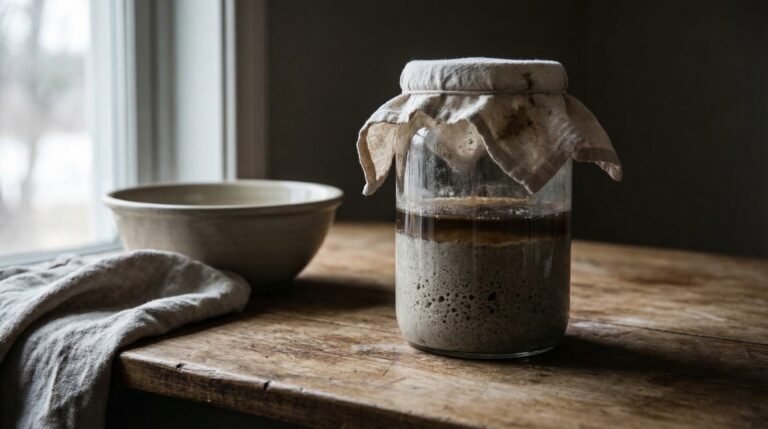
1. It Has Doubled in Size
This is the most obvious sign and the one most people know about. After feeding, a healthy active starter should roughly double in size within 4-8 hours at room temperature.
In summer mine hits peak faster — sometimes closer to 4 hours. In winter it slows down and can take the full 8 or even a little longer. That’s normal. Temperature drives fermentation speed more than anything else.
How to track it: I use the measurement markings on my starter jar — it has lines on the side so I can see exactly where it was when I fed it and how far it’s risen. Before I had a marked jar I used a rubber band around the outside. Low tech, works perfectly.
2. It’s Full of Bubbles
Not just a few bubbles on top — bubbles throughout. When you look through the side of your jar you should see activity all the way down, not just surface foam.
Big bubbles, small bubbles, a webby bubbly texture when you stir it — all good signs. A starter that’s only bubbling on top is starting to work but isn’t quite there yet.
3. It Smells Yeasty — Like Beer
A ready starter smells yeasty and alive. Mine smells like beer — that warm, slightly fermented, unmistakably active smell. Some people describe it as tangy or like yogurt. Both are right depending on your starter’s personality.
What you don’t want: nail polish remover (too hungry), truly rotten (something’s wrong), or just nothing at all (not active yet).
The smell is one of the fastest ways to check in on your starter without even opening the jar properly. After a while you’ll know by the smell alone whether it’s had a good feeding cycle.
4. It Passes the Float Test
Drop a small spoonful — about a teaspoon — into a glass of water. If it floats, it’s ready. If it sinks, it needs more time.
The float test works because an active starter is full of gas bubbles from fermentation — that gas is what makes it buoyant. If it’s not floating, it hasn’t produced enough gas yet, which means it’s not going to leaven your bread properly either.
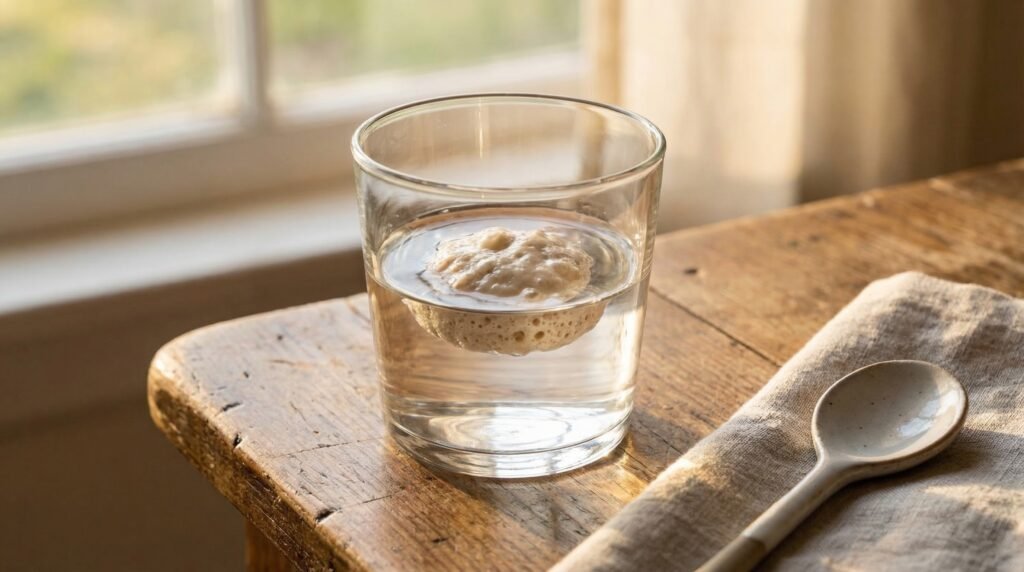
Quick caveat: the float test isn’t the only test and it’s not perfect. A starter at its very peak sometimes sinks because it’s started to deflate. Use it as one signal alongside the others, not as the only verdict.
5. It Has a Domed or Slightly Domed Top
At peak activity your starter will have a domed top — slightly rounded, pushing up against the lid. That dome is the visual sign that fermentation is at its most active.
Once the dome starts to flatten or fall, your starter is past its peak. It’s not ruined — you can still use it, especially for a more sour loaf — but for the best rise you want to catch it at or just before that dome starts to drop.
This is the sign I watch most carefully. The dome tells me everything.
Remember, knowing when your sourdough starter ready to bake is essential for every successful baking session.
6. It Has a Light, Airy Texture When Stirred
If your sourdough starter is looking great, it’s a good sign it’s ready to bake.
When is your sourdough starter ready to bake? This is a question every baker should be able to answer confidently.
Take a spoon and stir your starter. A ready starter feels light and almost fluffy — there’s air in it and it stirs easily. An unready starter feels dense and heavy, more like thick paste than anything airy.
Ensure your sourdough starter ready to bake undergoes the necessary feeding cycles for optimal performance.
Don’t forget, your sourdough starter needs to be ready to bake at just the right moment for the best results.
You’ll feel the difference immediately once you’ve experienced both. A ready starter almost bounces back a little when you stir it. An unready one just sits there.
7. It’s Consistently Doing All of the Above
One good feeding cycle doesn’t necessarily mean your starter is reliably ready to bake with. Consistency is what you’re looking for.
If your starter is doubling, bubbling, doming, floating, smelling yeasty, and feeling light — and it’s doing that reliably after every feeding — that’s a healthy, active starter you can bake with confidently.
If it’s inconsistent — great one day, sluggish the next — go back to basics. Feed it twice a day with a [1:2:2 ratio](link to feed starter post) for a few days and let it build strength before you bake with it.
Review these signs and use them to determine if your sourdough starter ready to bake is fit for use.
When Is Your Sourdough Starter Ready to Bake? The Timing Question
You want to bake at peak activity — right when your starter has fully doubled and the dome is still holding. That’s the sweet spot.
My routine: I feed my starter the night before I want to bake, leave it on the counter overnight, and by morning it’s at or near peak. I check all seven signs before I use it. If it’s not there yet I give it another hour or two.
In winter when my kitchen is cold, I put the jar in my countertop oven overnight — oven off, just the enclosed space keeps it slightly warmer. It makes a real difference. If you’re baking in a cold kitchen and your starter seems sluggish, try finding it a warmer spot before assuming it’s not ready.
What Happens If You Bake With a Starter That Isn’t Ready
I’ll tell you from experience.
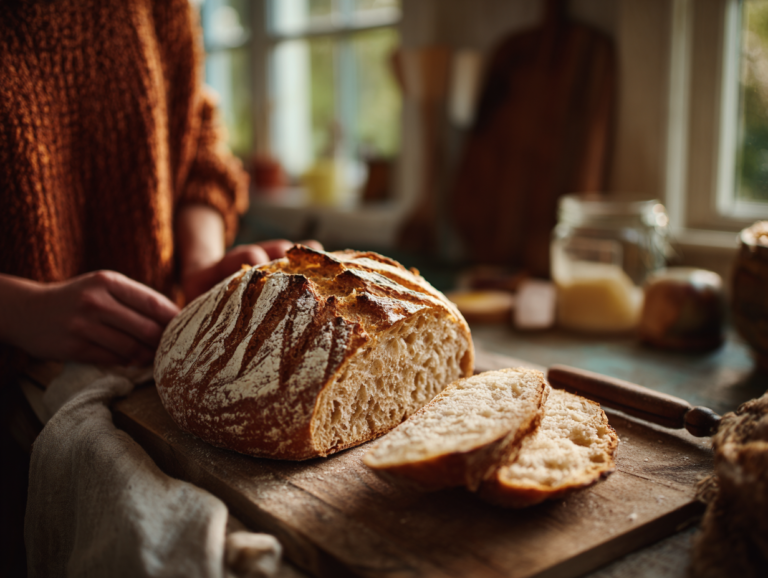
Too early: The loaf barely rises. It comes out denser than it should be, a little flat, and the crust doesn’t have the same crackle. Still edible — nobody is going to refuse a slice — but you’ll know. It’s a fine but not great loaf.
Too late: The dough can collapse in the oven. The starter has already consumed most of its food, the gas has dissipated, and there’s not enough left to hold the structure of the bread through baking. The result is a flat, dense loaf that looks defeated. Also still edible, but significantly more disappointing.
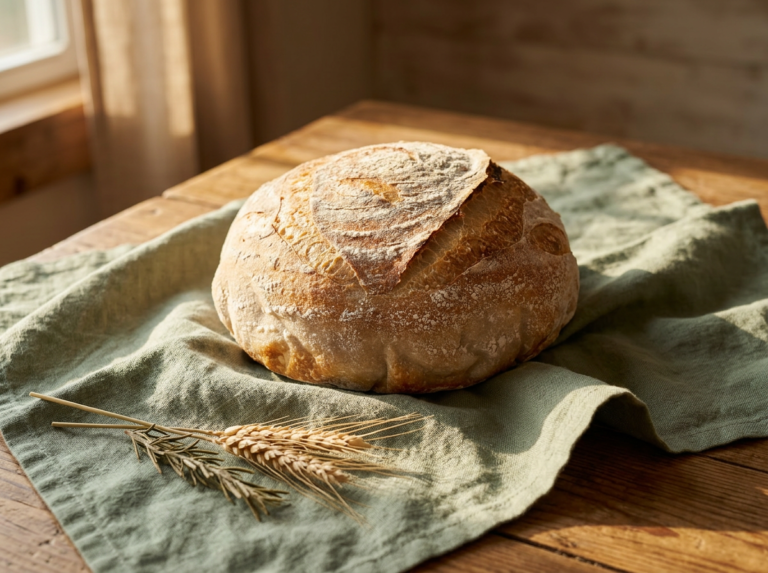
The window between too early and too late is wider than you think — probably a few hours on either side of peak. But catching it at peak is what gives you that beautiful open crumb and a proper oven spring. Worth the attention.
A Quick Checklist
Before you bake, run through this:
Ultimately, knowing your sourdough starter ready to bake will enhance your bread-making journey.
- ✅ Doubled in size since last feeding
- ✅ Bubbles throughout — not just on top
- ✅ Smells yeasty and alive
- ✅ Passes the float test
- ✅ Domed or just starting to dome on top
- ✅ Light and airy when stirred
- ✅ Consistently doing all of the above
If you can check all seven — you’re ready. Go bake something.
If you follow these tips, your sourdough starter ready to bake will yield fantastic results.
In summary, keeping an eye on your sourdough starter ready to bake is vital for a successful baking experience.
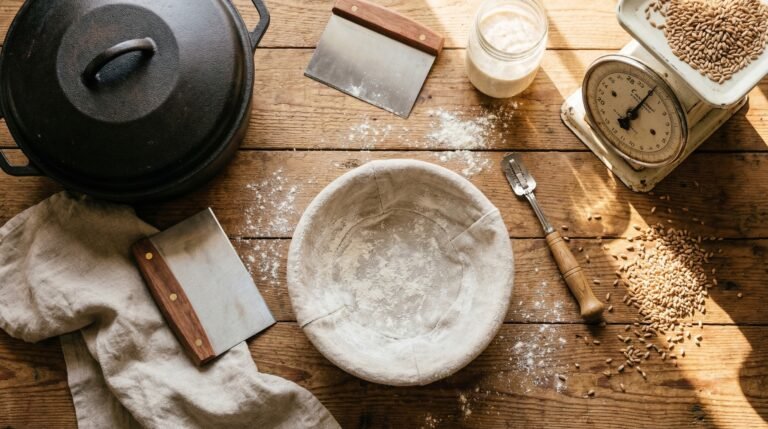
The Tools That Help
Starter jar with measurement markings — Makes tracking the rise completely effortless. Worth every penny just for this.
Kitchen scale — Consistent feedings produce consistent results. Measuring by weight is the only way to feed your starter the same amount every time.
Sourdough warming plate — For cold kitchens in winter. Set your starter jar on it and keep the temperature consistent without babysitting.
Don’t have a starter yet? Start here: How to Make a Sourdough Starter from Scratch →
Already have a starter but not sure how to feed it? Read this: How to Feed Your Sourdough Starter the Simple Way →
Ready to bake your first loaf? Here’s the method: Sourdough for Beginners: The Simple Method That Actually Works →